
Please forgive the horrible photos - I was in a hurry and the lighting in my home at night is terrible!
This is just a quick "Shortcut Cheryl" way of using a raw wool batting as a starting point for various needle felted projects. The raw wood batting is a nice way to save a bit of money and save the "good roving" for the "outside" of the project

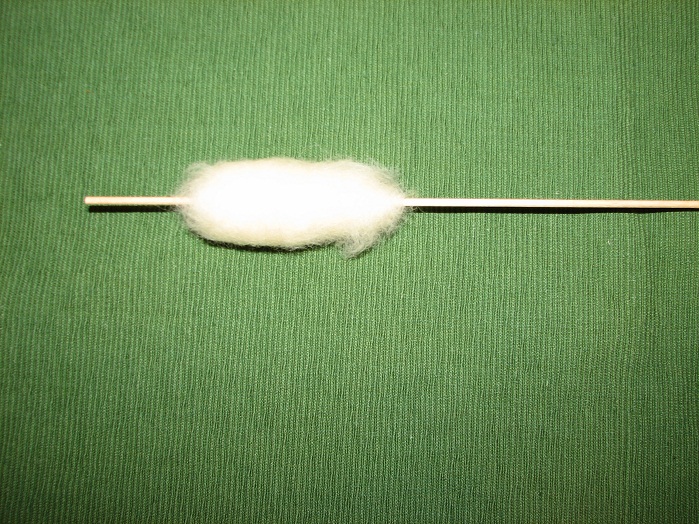
I just use thin craft dowel and raw wool batting
I tried regular bamboo skewers but the wool "stuck" to them. They will work in a pinch but these are smoother and you can always use a fingernail file or sand paper to "smooth" the dowel.

I "twirl" the dowel with one hand while I use the other hand to "guide" and gently hold the wool to keep it from being pulled onto the dowel to quickly. This is how I "feed" it onto the dowel as evenly and "tightly" as I can. It's kind of like cotton candy but more compact.

I keep adding wool until it's as large as I want the "core" of my project to be. You can do a bit of needle felting while it's on the dowel but be careful not to hit the dowel with you needle so you don't bend or break your needle!
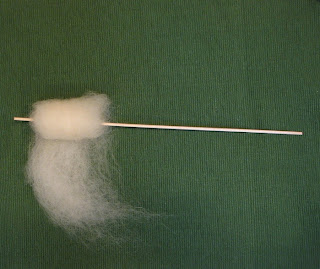

Just slip your "core" off the dowel and start shaping and adding your roving to finish it!
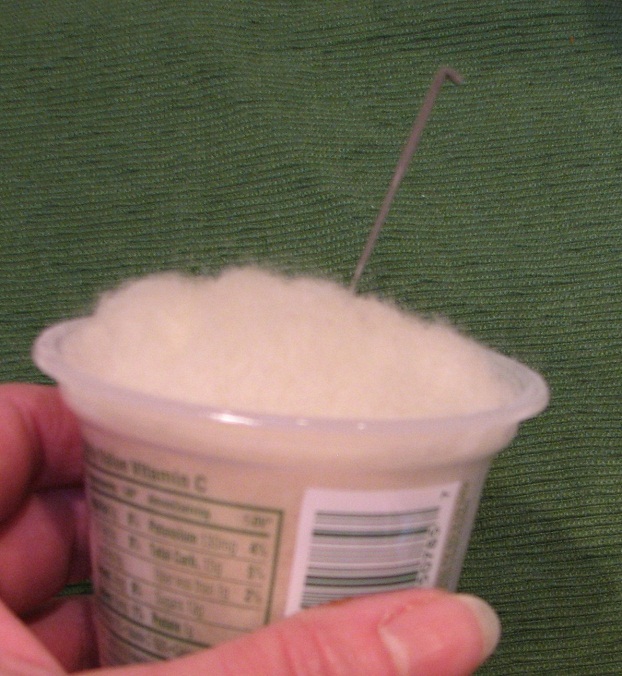
Container needle felting
Build your core without injuries!
Be careful not to hit the container with your felting needle!
Once they bend, they will eventually break!

I am a huge fan of recycling and eco-friendly crafting! I also don't like being stabbed with my felting needles!
The Petit Four pin cushion on the left was started on a dowel and then shaped into a square. But the cupcake pin cushion started it's life in a vintage coffee cup! Both cores are the wool batting and then they are finished with wool roving.


I put roving or wool batting in the cup. I use my needle to felt while I hold the cup by the handle - keeping my hand safe from stabs! I keep adding the wool and turn the project quite a bit until it's firm. It just pops right out of the cup when you are done. OR you can finish it in the cup with some tan/brown roving to make it look like a cup of tea and use it for a pin cushion!
Now these Del Monte fruit containers were just too cool to throw away or send to the recycler!
Make frozen treats for the kids, mold soap, etc. OR use them for needle felting!
I like these because they are plastic and I can watch a movie while I needle felt without injuries!


First - eat your fruit! Mom will be proud - I recommend the pink grapefruit!
Then after you wash and thoroughly dry it, start filling it with wool roving or batting and needle felt away! Just keep adding wool and build your core! I remove the wool and turn it every once in awhile to achieve a more even "felting." It will pop right out of the container when you are ready to use it to build your project!


Thank you!!! This is such a great tutorial! I found it on Pinterest. I always wondered if there would be a way for me to needlefelt and watch a movie at the same time! I'm going to try this right now.
ReplyDeleteOh you are so welcome! I am glad someone can use the ideas! I have battle scars from needle felting before I started using containers :)
ReplyDeleteI had no idea it was "pinned" on Pintrest.com - how nice to see that! Thank you for telling me - now I have to go spend a day ooohing and ahhhing there! Enjoy your movie while you needle felt without injuries!
xoxo, Cheryl